You'll need a strand of Christmas lights* and D batteries.
To prepare the lights, cut them apart into 2 or 3 light chunks. You'll want to invest in a cheap (or higher quality if you desire, but for this, cheap works!) wire cutter/stripper for this. The wires are thin and could probably be cut through with a scissors, but you'll want the tool for the next step...
Strip about an inch of the insulation from each end of the lights.

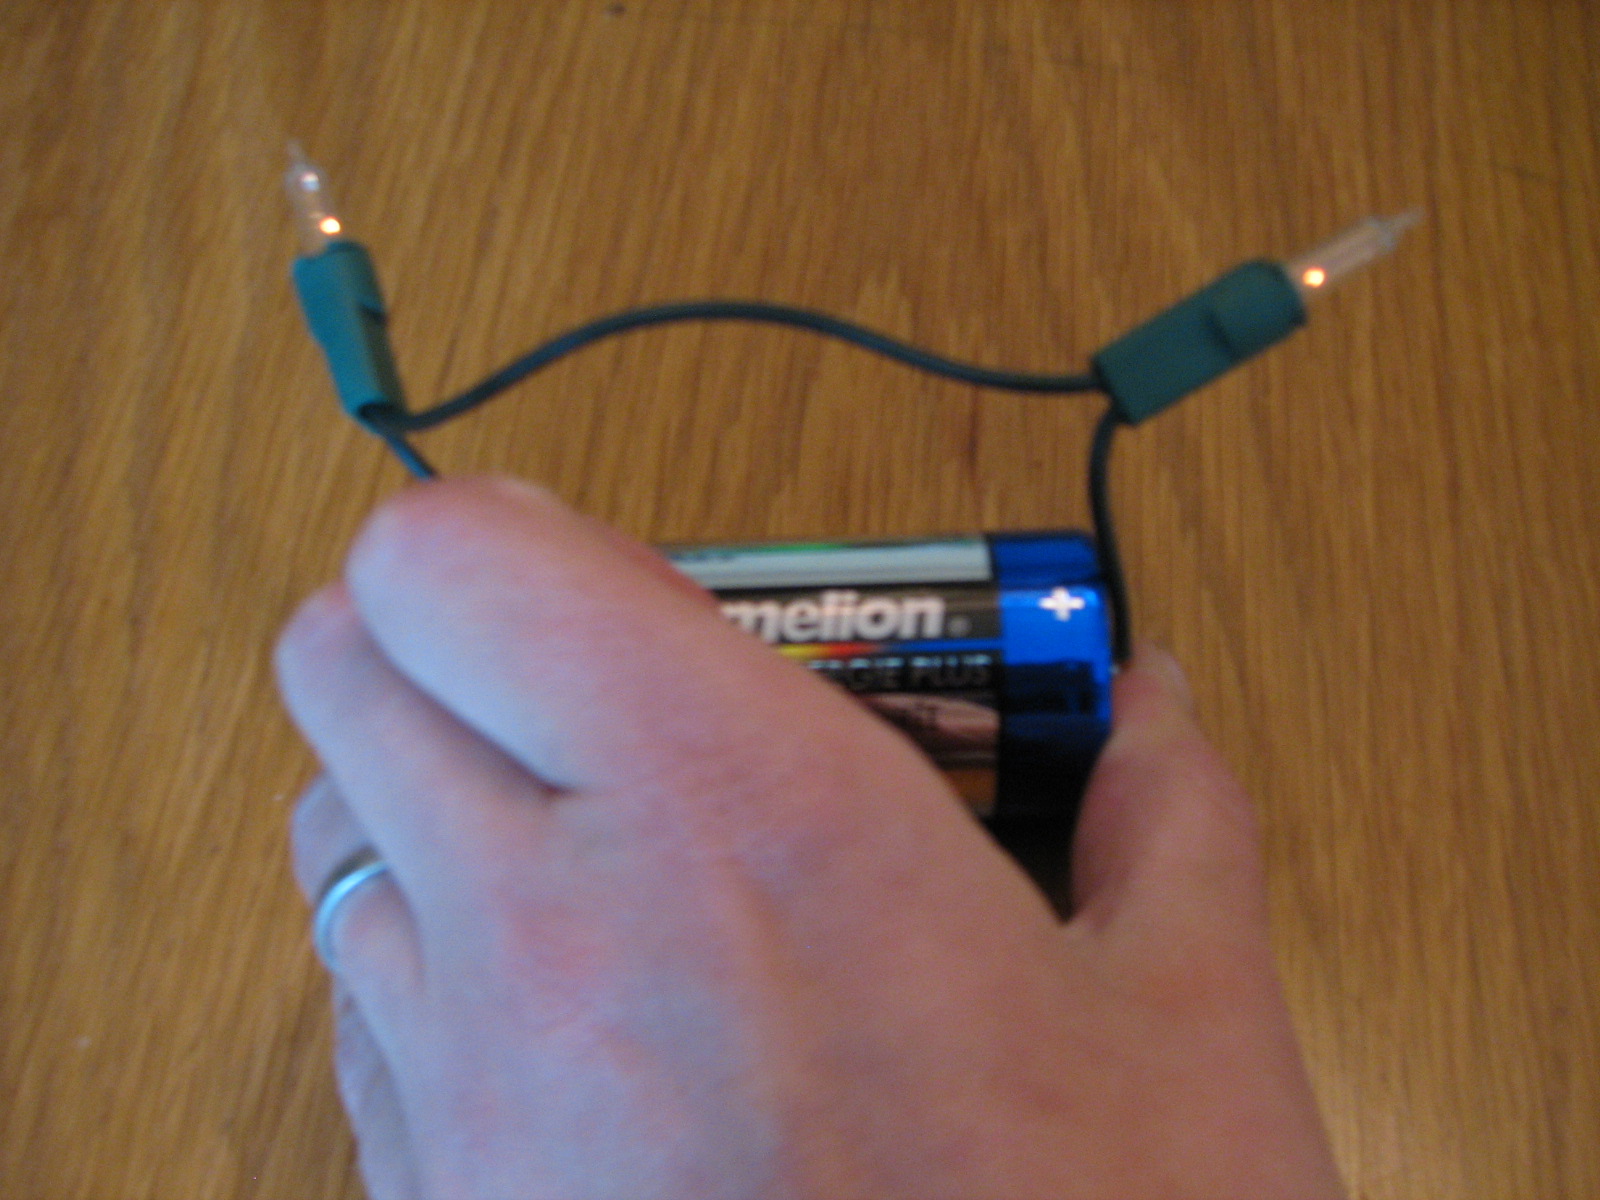
In class, hand each student (or pair of students) a strand of lights and a battery. Have them figure out how to make the lights light. That's pretty easy....
Then give them a second strand of lights and have them figure out how to get both strands to light. There are two different ways to accomplish this...

1 - Twist the ends of the strands together to make one large loop.

Once students have found one way to light both strands, challenge them to find a second way. After students have had the chance to experiment, talk with them about parallel and series circuits - they'll understand it, after having created them on their own!
In my experience, this leads to all kinds of extensions....
As you add strands, the lights will become dimmer. Why? What can you do to make them brighter again?
The students will want to see if they can string all of their lights together and see if they can light - let them try! How many batteries will it take?
Are smaller batteries strong enough to power the lights?
*You'll want to use clear bulbs. One time I found a string of blue lights in the garage, which I thought would be perfect for this, seeing as I didn't want them for anything else. But, since you're only using a D cell, the light is too hard to see through the colored bulb.


No comments:
Post a Comment
Note: Only a member of this blog may post a comment.